Using FTP Server Access for Site Development with UltraDev
by Judy Fontanella
Part A - The Site Setup
UltraDev Site Setup
When you create a dynamic site with UltraDev, it is extremely important to get the site setup dialog boxes filled in correctly. UltraDev will use the information you supply to upload your files to the server and to retrieve information from your database throughout development. If you find that you can't retrieve information from your database as you are creating your pages, there is often a problem with your site setup or with the connection to your database.
There are many different ways you can set up your site with UltraDev depending on your server and computer configurations. The method that I will show you uses FTP to connect to a remote server.
Usernames, Passwords, FTP Addresses and URL's
Before you begin, be sure that you know the FTP address, username and password
that will allow you to login to your site on the server using FTP. You will
also need to know the URL that you will use to reach the top directory of your
site when you use your browser to visit it. You will be able to find out this
information from your hosting service or server administrator.
Setting up your site in UltraDev
- Create a folder on your hard drive and name it something that you
will recognize as the main folder that contains your Web site. My site is
named "LinksDemo." You will use this folder as the
main root folder for your site.
- Define your site in UltraDev
- Open the site window in UltraDev. Use the Site Menu at the top to select "Define Sites."
- In the Define Sites dialog box, click the "New" button.
- You will get the Site Definition dialog box.
- Under the Local Info Category make these changes:
- Site Name: Type in a name that you will recognize for this site. It can be anything that you like.
- Local Root Folder: Navigate to the main site folder that you just created on your hard drive in part I. If you have chosen the folder correctly, it will be the last folder listed in the "Local Root Folder" text box.
- Check "Refresh Local File List Automatically" so that you will see file changes as soon as they are made.
- HTTP Address: Type in the URL that you would use to reach the top level folder in your site with your browser.
- Check "Enable Cache".

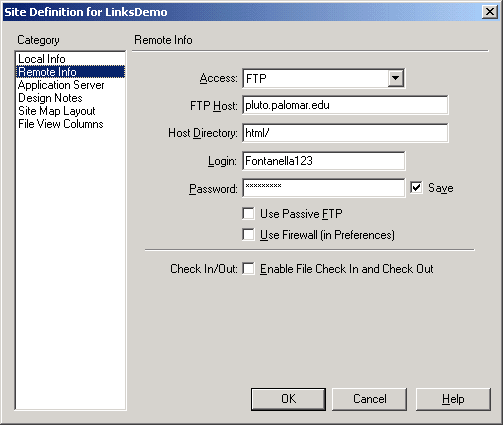
- Under the Remote Info Category make these changes:
- Access: Select "FTP".
- FTP Host: type in the FTP address of your server. In this case
it's "pluto.palomar.edu".
- Host directory: In many cases, you will leave this text box
blank. However, some sites are set up so that you put all of the files
that are accessible from a browser in a subfolder named something like
html, www, public_html, etc. If that is the case with your site, you
will need to add the name of that subdirectory here. Adding a directory
name here will cause you to log into that sub directory of your site.
If you need to have access to the folders above this folder, you can
use another FTP program to do so.
- Login: Fill in your username.
- Password: Fill in your password.
- Leave the next two check boxes unchecked unless you know for sure
that you are behind a firewall and will need to bypass it. The Check
In/Out option is for use in development team environments. It prevents
individuals from overwriting each other's changes.

- Under the Application Server Category make these changes if necessary:
- Server Model: Select ASP 2.0 ( Note: These directions
assume that you are using ASP middleware. You may also use Cold Fusion
or Java Server pages, if that is the middleware that is available on
your server. If you are not using ASP, then make appropriate choices
for numbers 2 and 3 below. )
- Scripting Language: Select VBScript.
- Page Extension: Select .asp.
- Access: Select FTP
- FTP Host: The FTP address of your server. The FTP Host, Host
Directory, Login and Password will probably already be filled in correctly
for you, because they contain the same information that you entered
on the previous screen. Do check to be sure that the information is
correct, however.
- Host Directory: See E3 above for the directions here.
- Login: Your username.
- Password: Your password.
- Leave the next two check boxes unchecked unless you know that you
are behind a firewall and need to check them.
- URL Prefix: Type the URL that would get you to the root folder
of your site when you type it into your browser. It is very important
to get this right, because UltraDev will use this information to retrieve
the table and field information from your database when you are creating
your pages. Your address will look something like this: "http://pluto.palomar.edu/Username"
or this: "http://www.mydomain.com". This textbox needs
careful editing to be sure that it is correct.

- Click OK.
- Click Done.

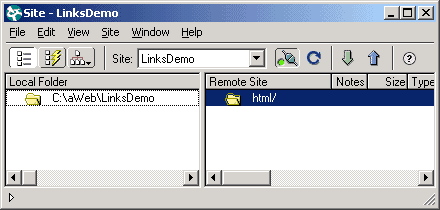
If you click on the Connect button, the one that looks like a plug, you should connect to your site on the server. Now you're ready to continue on to Part B - Connecting to Your Database.
On to Part B - Connecting to Your Database
|